2016-04-19

Remap Keyboard Shortcut on Mac OSX

Recently I bought a secondhand Macbook Pro, since it's sold in a really-really good price. This is my first time experiencing Mac OSX, and my experience has been quite good, almost everything is there and easy as easy as yaourt+better automation (called brew), better UI than Windows, and I never feel any lag (maybe because it's SSD). All great, except, the shortcut keys, it's quite weird to have Fn key on the left of Ctrl key (just like most Lenovo laptops), also command key that replaces almost every normal shortcut on Windows and Linux.

First few days, using the shortcuts, I quite dissatisfied until I found about Karabiner! With that app, I could remap every keyboard shortcuts that I like so it becomes similar to Linux and Windows settings.


First thing I've done is switch Ctrl and Fn and vice versa. For all other shortcut, I edit the private.xml to match my preferred shortcut to Mac's shortcut. These are the content of the file:

<?xml version="1.0"?>
<root>
    <appdef>
        <appname>ITERM2</appname>
        <equal>com.googlecode.iterm2</equal>
    </appdef>
    <appdef>
        <appname>INTELLIJ</appname>
        <equal>com.jetbrains.intellij</equal>
    </appdef>
    <item>
        <name>Command-Q to Control-C</name>
        <appendix>Cmd-Q to Ctrl-C for iTerm2</appendix>
        <identifier>CQ2CC</identifier>
        <only>ITERM2</only>
        <autogen>
            __KeyToKey__
            KeyCode::Q, ModifierFlag::COMMAND_L,
            KeyCode::C, ModifierFlag::CONTROL_L
        </autogen>
    </item>
    <item>
        <name>Control to Alt</name>
        <appendix>Ctrl to Alt (Left/Right/Backspace)</appendix>
        <identifier>C2A</identifier>
        <not>INTELLIJ</not>
        <autogen>
            __KeyToKey__
            KeyCode::DELETE, ModifierFlag::CONTROL_L,
            KeyCode::DELETE, ModifierFlag::OPTION_L
        </autogen>
        <autogen>
            __KeyToKey__
            KeyCode::CURSOR_LEFT, ModifierFlag::CONTROL_L,
            KeyCode::CURSOR_LEFT, ModifierFlag::OPTION_L
        </autogen>
        <autogen>
            __KeyToKey__
            KeyCode::CURSOR_RIGHT, ModifierFlag::CONTROL_L,
            KeyCode::CURSOR_RIGHT, ModifierFlag::OPTION_L
        </autogen>
        <autogen>
            __KeyToKey__
            KeyCode::CURSOR_LEFT, ModifierFlag::CONTROL_L | ModifierFlag::SHIFT_L,
            KeyCode::CURSOR_LEFT, ModifierFlag::OPTION_L | ModifierFlag::SHIFT_L
        </autogen>
        <autogen>
            __KeyToKey__
            KeyCode::CURSOR_RIGHT, ModifierFlag::CONTROL_L | ModifierFlag::SHIFT_L,
            KeyCode::CURSOR_RIGHT, ModifierFlag::OPTION_L | ModifierFlag::SHIFT_L
        </autogen>
    </item>
    <item>
        <name>Control to Command</name>
        <appendix>Ctrl to Cmd (A/C/F/R/S/T/V/W/X/Z)</appendix>
        <identifier>C2C</identifier>
        <autogen>
            __KeyToKey__
            KeyCode::A, ModifierFlag::CONTROL_L,
            KeyCode::A, ModifierFlag::COMMAND_L
        </autogen>
        <autogen>
            __KeyToKey__
            KeyCode::C, ModifierFlag::CONTROL_L,
            KeyCode::C, ModifierFlag::COMMAND_L
        </autogen>
        <autogen>
            __KeyToKey__
            KeyCode::F, ModifierFlag::CONTROL_L,
            KeyCode::F, ModifierFlag::COMMAND_L
        </autogen>
        <autogen>
            __KeyToKey__
            KeyCode::L, ModifierFlag::CONTROL_L,
            KeyCode::L, ModifierFlag::COMMAND_L
        </autogen>
        <autogen>
            __KeyToKey__
            KeyCode::R, ModifierFlag::CONTROL_L,
            KeyCode::R, ModifierFlag::COMMAND_L
        </autogen>
        <autogen>
            __KeyToKey__
            KeyCode::S, ModifierFlag::CONTROL_L,
            KeyCode::S, ModifierFlag::COMMAND_L
        </autogen>
        <autogen>
            __KeyToKey__
            KeyCode::T, ModifierFlag::CONTROL_L,
            KeyCode::T, ModifierFlag::COMMAND_L
        </autogen>
        <autogen>
            __KeyToKey__
            KeyCode::V, ModifierFlag::CONTROL_L,
            KeyCode::V, ModifierFlag::COMMAND_L
        </autogen>
        <autogen>
            __KeyToKey__
            KeyCode::W, ModifierFlag::CONTROL_L,
            KeyCode::W, ModifierFlag::COMMAND_L
        </autogen>
        <autogen>
            __KeyToKey__
            KeyCode::X, ModifierFlag::CONTROL_L,
            KeyCode::X, ModifierFlag::COMMAND_L
        </autogen>
        <autogen>
            __KeyToKey__
            KeyCode::Z, ModifierFlag::CONTROL_L,
            KeyCode::Z, ModifierFlag::COMMAND_L
        </autogen>
    </item>
</root>

Keyboard map above will trigger most of mac shortcut, but using Ctrl key instead of Cmd key:

  • Cmd-Q will trigger Ctrl-C (exit current program) on iTerm2
  • Ctrl-Left/Right: skip word
  • Ctrl-Shift-Left/Right: select word
  • Ctrl-Backspace: delete 1 word
  • Ctrl-A: select all
  • Ctrl-C: copy
  • Ctrl-F: find
  • Ctrl-L: location
  • Ctrl-R: refresh
  • Ctrl-S: save
  • Ctrl-T: new tab
  • Ctrl-V: paste
  • Ctrl-W: close tab
  • Ctrl-X: cut
  • Ctrl-Z: undo
I didn't put some other shortcuts that I didn't use (mostly because it's can be configured on the IDE/TextEditor) or just because it's already works well, for example Ctrl-Tab for switching tab, Ctrl-D for logout, and so on. If you want to learn more, you can read the reference here.

2016-03-09

Lightweight Go IDE (with Debugging support)

Today I found that Visual Studio Code by Microsoft is quite charming, it based on Electron, library that being used to make Atom Editor (and Nuclide by Facebook). It loads fast, really fast. In ArchLinux or Manjaro, you can install it using this command:

yaourt -S visual-studio-code

After installing, type Ctrl+Shift+P, Install Extension, choose Go (Rich Go bla bla..). And yes, it requires internet connection.

Then install the tools required:

go get -u -v github.com/nsf/gocode
go get -u -v github.com/rogpeppe/godef
go get -u -v github.com/golang/lint/golint
go get -u -v github.com/lukehoban/go-find-references
go get -u -v github.com/lukehoban/go-outline
go get -u -v sourcegraph.com/sqs/goreturns
go get -u -v golang.org/x/tools/cmd/gorename
go get -u -v github.com/tpng/gopkgs
go get -u -v github.com/newhook/go-symbols

For debugging, install delve (it requires Go 1.5 or newer).

The import bulb will show if a package not yet imported:

The autocomplete just works as expected:

Argument tooltip (parameter info) shown correctly:

Jump to definition works (Ctrl+Click):

I believe this is better alternative (for now) than Atom, Brackets, LightTable, and LimeText (incomplete SublimeText implementation).

2016-02-28

Unfair Database Benchmark

So today we will benchmark some popular database, PostgreSQL, MySQL (Percona), Aerospike, Couchbase, MongoDB, Redis under 64-bit Linux (i7-4700MQ, 16GB RAM, non SSD harddisk) and Go using certain library. The settings for each database should have maximum 4GB in working memory, each insert should be done in transaction (if possible), index must be created (if possible), searching 40 times of insertion number in random.

Disclaimer: this is not apple to apple comparison, you can look for the source (and sent a pull request) on my github or dropbox. Let's get started!

PostgreSQL (9.5.1)

using JSONB data type

sudo pacman -S postgresql

sudo su - postgres <<EOF
initdb --locale en_CA.UTF-8 -E UTF8 -D '/var/lib/postgres/data'
EOF

echo "
max_connections = 64                 
superuser_reserved_connections = 3   
shared_buffers = 2GB                 
work_mem = 32MB                      
dynamic_shared_memory_type = posix  
effective_cache_size = 4GB
logging_collector = off         
datestyle = 'iso, dmy'
timezone = 'Asia/Jakarta'
lc_messages = 'en_CA.UTF-8'                    
lc_monetary = 'en_CA.UTF-8'                    
lc_numeric = 'en_CA.UTF-8'                     
lc_time = 'en_CA.UTF-8'                        
default_text_search_config = 'pg_catalog.english'
" > /var/lib/postgresql/data/postgresql.conf

sudo systemctl start postgresql

sudo su - postgres <<EOF
createdb test2
EOF

go get -u -v gitlab.com/kokizzu/gokil

The result:

initial database size: 7192 kB
INSERT micro 100 983.62 ms
INSERT tiny 1000 13223.53 ms
INSERT small 10000 119006.15 ms
final database size: 10 MB
SEARCH micro 100 354.34 ms
SEARCH tiny 1000 3499.50 ms
SEARCH small 10000 35499.98 ms


MySQL (Percona 5.7.10)

using InnoDB, current JSON data type doesn't support indexing

sudo pacman -S percona-server percona-server-clients 

echo '[client]
port            = 3306
socket          = /run/mysqld/mysqld.sock
[mysqld]
port            = 3306
socket          = /run/mysqld/mysqld.sock
datadir         = /var/lib/mysql
symbolic-links=0
sql_mode=NO_ENGINE_SUBSTITUTION,STRICT_TRANS_TABLES
key_buffer_size = 800M
max_allowed_packet = 16M
table_open_cache = 64
sort_buffer_size = 32M
net_buffer_length = 4M
read_buffer_size = 16M
read_rnd_buffer_size = 16M
myisam_sort_buffer_size = 128M
innodb_buffer_pool_size = 4G
[mysqld_safe]
log-error       = /var/log/mysqld.log
pid-file        = /run/mysqld/mysqld.pid
' > /etc/mysql/my.cnf

sudo systemctl start mysqld

echo 'CREATE DATABASE test2' | mysql -u root

The result:

initial database size: 0
INSERT micro 100 3258.85 ms
INSERT tiny 1000 32297.04 ms
INSERT small 10000 341951.99 ms
final database size: 2.02 MB
SEARCH micro 100 282.32 ms
SEARCH tiny 1000 2843.62 ms
SEARCH small 10000 28404.53 ms


MongoDB (3.2.3)

using struct and map[string]interface{} inside the struct

sudo pacman -S mongodb

go get -u -v gopkg.in/mgo.v2

The result:

initial database size: 78 MB

INSERT micro 100 10.19 ms
INSERT tiny 1000 83.58 ms
INSERT small 10000 894.40 ms
final database size: 78 MB
SEARCH micro 100 321.75 ms
SEARCH tiny 1000 3183.75 ms
SEARCH small 10000 33069.50 ms


CouchBase (4.0.0)

invalid implementation, always got panic: {MCResponse status=0x20 keylen=0, extralen=0, bodylen=12}

sudo yaourt -S couchbase-server-community

go get -u -v github.com/couchbase/go-couchbase

sudo systemctl restart couchbase-server

Visit http://127.0.0.1:8091 to configure, I use 3000MB data cache and 1000MB index cache.

The result (incorrect):

initial database size: 4.06 MB
INSERT micro 100 132.29 ms
INSERT tiny 1000 1317.61 ms
INSERT small 10000 13082.86 ms
final database size: -
SEARCH micro 100 - ms
SEARCH tiny 1000 69020.08 ms
SEARCH small 10000 - ms


AeroSpike (3.7.4)

without secondary index, since I could not found source or binary package for their command line tool for creating the index)

sudo yourt -S aerospike-server-ce
# change this two line on PKGBUILD:
# source=("http://aerospike.com/download/server/latest/artifact/tgz")
# sha512sums=('e9a574e5020db9542de51ad0a1d8da28b8f89d10505848c406656cf113654c0135dfd63fe0aaaafb06f50938124a00275f1b2a0a5ead7058b7b53964c046f3a1')

go get -u -v github.com/aerospike/aerospike-client-go

cd /
sudo aerospike init 

echo '
namespace test2 {
  replication-factor 2
  memory-size 4G
  default-ttl 0 # 30 days, use 0 to never expire/evict.
  storage-engine device {
    file /opt/aerospike/data
    filesize 1G
  }
}' >> /etc/aerospike.conf

sudo mkdir /opt/aerospike

sudo aerospike start

The result:

initial database size: 1 GB
INSERT micro 100 4.63 ms
INSERT tiny 1000 40.75 ms
INSERT small 10000 426.20 ms
final database size: 1 GB
SEARCH micro 100 113.93 ms
SEARCH tiny 1000 1086.70 ms
SEARCH small 10000 11259.24 ms


Redis (3.0.7)

using gob for serialization and deserialization.

sudo yourt -S redis

go get -u -v github.com/garyburd/redigo/redis

sudo systemctl start redis

The result:

initial database size: 18 bytes

INSERT micro 100 3.94 ms
INSERT tiny 1000 38.28 ms
INSERT small 10000 377.24 ms
final database size: 3.9 MB
SEARCH micro 100 424.79 ms
SEARCH tiny 1000 4263.79 ms
SEARCH small 10000 42904.11 ms

Here's the recap:


2016-02-26

Techempower Framework Benchmark Round 12

After long wait, the latest Techempower Framework Benchmark 12 is out! And it's quite shocking that Go's fasthttp really really fast. As usual the most important thing is data updates:


Top ranker in this part (more than 2000 req/s) are Go, C++, Perl, Dart, Javascript (NodeJS), Clojure, Java, PHP (HHVM), Scala, Python, and Ruby.
Hopefully this library (fasthttp) could become the new standard implementation, maybe for Go 2.0? :3

2016-02-22

Gokil Golang Library (and Web Framework)

Gokil (Golang Keen for Improvement Library), is a library that I've been using for about 1.2 years. It was made based on httprouter and designed to have SnakeCase ruby-like functions. In Indonesian language "gokil" means insane, unpredictable, funny, or unique. To use this library, first you must have installed Go and configure GOPATH correctly, then fetch the library:

go get -u -v gitlab.com/kokizzu/gokil

There are six more program dependencies required:

# session, log multiplexer, binary compressor
sudo pacman -S redis unbuffer upx

# colorize compile output
go get -u -v github.com/kokizzu/colorgo

# auto-compile and reload on code changes, 
# please use go 1.4 since 1.5+ has slower compile speed
go get -u -v github.com/kokizzu/gin

# binary compressor for deployment
go get -u -v github.com/pwaller/goupx

If your connection is too slow, you can download the dependency files (and all example codes below) here (extract the content to GOPATH/src), don't forget to update to latest version using command above.

So, what's all about with this library?
First, it splitted into few directory:
  • A for Array
  • B for Boolean
  • C for Character
  • D for Database
  • F for Floating-point
  • I for Integer
  • J for JSON
  • K for anything else
  • L for Logging
  • M for Map
  • S for String
  • T for Time
  • W for Web (framework)
  • X for any type
  • Z for template engine
How to use the library, just like a normal library, you can include and then use them:

package main
import (
  `gitlab.com/kokizzu/gokil/S`
  `gitlab.com/kokizzu/gokil/L`
)

func main() {
  x := `12345678`
  L.Print(`x in int64: `, S.ToI(x) )
}

Program above will show an output:

2016-02-22 12:40:31.376 Print ▶ o:8: 
x in int64:  12345678

If you want to use the web framework, you can prepare these directories within your project folder (in this example, the project name is "PresFIS"):
  • ajax (to handle all HTTP POST request)
  • model (to do any kind of database query)
  • page (to handle all HTTP GET request)
  • views (the template for rendering)
  • public (the public/asset resource)
  • logs (log files)
mkdir $GOPATH/PresFIS
cd $GOPATH/PresFIS
mkdir -p ajax model page views public/js public/css logs

Create the .gitignore file:

echo 'logs
public/css/all.css
public/js/all.js
public/css/lib.css
public/js/lib.js
gin-bin
.idea' > .gitignore

Create a assets.go file, the files included here should be put in the public/ directory, named main.js and js/jquery.js. If you want the source to be outside the js/ or css/ folder, just add a slash prefix. These files will be minified into two files lib.js and all.js on production (this also works for css files). Of course you can skip this part and include the javascript or css files directly on the views if you do not want the code to be minified.


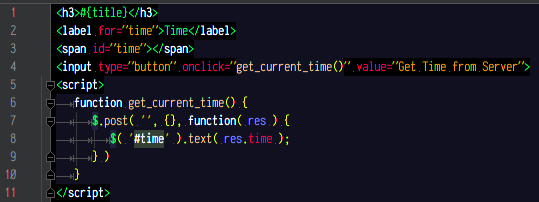
Create a page/public.go, I usually make first segment of the url to be the file name, so it can be searched easily, it should contain something like this:


Create the views, in views/public/hello.htmlhey.html and home.html (on views/ folder) for example:


<a href="/public/hello">Hello</a>
<a href="/public/hey/1">Hey 1</a>
<a href="/public/hey/2">Hey 2</a>

There are 4 syntax for push template rendering that do exactly the same:
  • #{locals_key}
  • {/* locals_key */}
  • [/* locals_key */]
  • /*! locals_key */
each of them will print the locals_key if the key not found on the locals (second parameter of ctx.Render).

Create a views/layout.html file, that will be called wrapping the views being rendered, something like this:

<!doctype html>
<html lang="en">
<head>
  <meta charset="utf-8">
  <meta http-equiv="X-UA-Compatible" content="IE=edge">
  <meta name="viewport" content="width=device-width, initial-scale=1">
  <title>#{title} | #{project_name}</title>
</head>
<body style="width:100%; height: 100%; overflow-x: visible">
#{resources}
<noscript>
  Please enable Javascript or use Javascript-enabled browser.
</noscript>
<div id="wrapper" style="width:100%; height:100%; margin: 0 auto">
  #{contents}
</div>
</body>
</html>

Create an ajax handler ajax/public.go, with the same rule as the the page:


Create a router.go file, the file should contain handlers, for example:


Create error views 403.html404.html, 500.html,:503.html, and error.html

<h1><b>Error 403</b>: Forbidden</h1>
<h2>#{requested_path}</h2>
<br/>
<p>It's forbidden for you to access this page (insufficient privilege), either contact the #{webmaster} or
  try again. Use your browser's <b>Back</b> button to navigate to the page you have previously come from</p>
<p><b>Or you could just press this neat little button:</b></p>
<button class="btn btn-large btn-info" onclick="window.history.back()">
  <i class="glyphicon glyphicon-arrow-left"></i> Take Me Back
</button>
<button class="btn btn-large btn-info" onclick="window.location='/'">
  <i class="glyphicon glyphicon-home"></i> Take Me Home
</button>

<h1><b>Error 404</b>: Page Not Found</h1>
<h2>#{requested_path}</h2>
<img src="/img/404.jpg"/>
<br/>
<p>The page you requested could not be found, either contact the #{webmaster} or try again. Use your
  browser's <b>Back</b> button to navigate to the page you have previously come from</p>
<p><b>Or you could just press this neat little button:</b></p>
<button class="btn btn-large btn-info" onclick="window.history.back()">
  <i class="glyphicon glyphicon-arrow-left"></i> Take Me Back
</button>
<button class="btn btn-large btn-info" onclick="window.location='/'">
  <i class="glyphicon glyphicon-home"></i> Take Me Home
</button>

<h1><b>Error 500</b>: Internal Server Error</h1>
<h2>#{requested_path}</h2>
<img src="/img/500.jpg"/>
<br/>
<p>There is a possible programming mistake on this page, either contact the #{webmaster} or try again. Use
  your browser's <b>Back</b> button to navigate to the page you have previously come from</p>
<p><b>Or you could just press this neat little button:</b></p>
<button class="btn btn-large btn-info" onclick="window.history.back()">
  <i class="glyphicon glyphicon-arrow-left"></i> Take Me Back
</button>
<button class="btn btn-large btn-info" onclick="window.location='/'">
  <i class="glyphicon glyphicon-home"></i> Take Me Home
</button>

<h1><b>Error 503</b>: Server is Over Capacity</h1>
<h2>#{requested_path}</h2>
<img src="/img/503.jpg"/>
<br/>
<p>Server is over capacity, please wait 30 minutes then try again by clicking your browser's <b>Refresh</b>
  button (F5/Ctrl+R)</p>
<p><b>Or you could just press this neat little button:</b></p>
<button class="btn btn-large btn-info" onclick="window.location.reload()">
  <i class="glyphicon glyphicon-refresh"></i> Refresh
</button>
<button class="btn btn-large btn-info" onclick="window.history.back()">
  <i class="glyphicon glyphicon-arrow-left"></i> Take Me Back
</button>
<button class="btn btn-large btn-info" onclick="window.location='/'">
  <i class="glyphicon glyphicon-home"></i> Take Me Home
</button>

<h1><b>Error</b>: #{message}</h1>
<pre>#{detail}</pre>
<h2>#{requested_path}</h2>
<br/>
<p>Insufficient privilege or invalid parameter, either contact the #{webmaster} or try again. Use
  your browsers <b>Back</b> button to navigate to the page you have previously come from</p>
<p><b>Or you could just press this neat little button:</b></p>
<button class="btn btn-large btn-info" onclick="window.history.back()">
  <i class="glyphicon glyphicon-arrow-left"></i> Take Me Back
</button>
<button class="btn btn-large btn-info" onclick="window.location='/'">
  <i class="glyphicon glyphicon-home"></i> Take Me Home
</button>

Create the main server.go file to initialize the server:


The main function:


You could also add a filter (for example, checking session from ctx.Session), something like this:


Create the start_dev.sh (auto-reload), deploy_prod.sh (rsync to server) and run_production.sh (start the service on server) scripts:


After starting the start_dev.sh and visit http://127.0.0.1:3000/ logs like this will show up on the terminal:


The dots means an access to public/ directory, if you want to hide them, you can add an reverse proxy like nginx or caddy.

Here's the minimal project structure:

What about the model/ directory? You can create a global connection, initialize with init function, then create a query function that can be called within ajax/ or page/.

Bonus: pullpush.sh script..


That's all for now, you can contribute to this library by sending a pull request on gitlab.

2016-02-13

Cloud Computing Platform

So recently my colleague's startup really need a scalable application, that could handle billion hits, so I really need to learn to utilize cloud service instead of depend on one or two normal PC with huge RAM (that I prefer to use when the users are lower than 10k of non-static hit), rather than building your own server farm, that probably costs higher. Some of the famous cloud (IaaS or PaaS) services are:
Some parts of the information above shamelessly copied from wikipedia. There are some comparison about the price, more price, even more price, featuresterms, and performance out there. Which one the best for you? depends on your budget and your developer's skill.